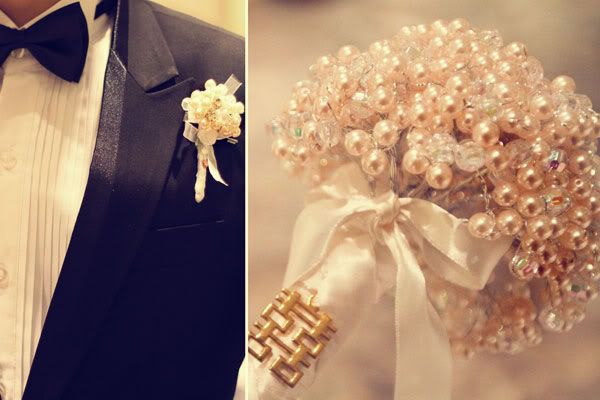
When I first started my wedding planning process, the first thing i decided was that I would be using NO REAL FLOWERS! That's right...not a single one. Being on a budget, it makes no sense to spend money on something that wont last through the weekend. Whatever i spend money on, I would like to get my moneys worth and after that weekend, wilted flowers will do me no good. So i brainstormed, I've seen fabric flowers, tissue paper flowers, brooch bouquets, even feather bouquets, but the one that caught my eye was this pearl bouquet I saw
here.
Amazing, aint it!
So I skipped over to Amazon.com and got me some glass beads and Artistic wire and got to work!
Both packets of beads + wire = $14 and change
Note: i suggest you buy 6mm+ beads, the small ones pictured are 4mm and they don't add much volume to the bouquet which = more beads to buy and a longer time spent working on it. This was about 200 beads total and only turned out to be 1/3 the size i wanted. So i ran to walmart for these
Theyre 7.4mm and aren't as shiny as the others, but the different sizes and colors add a nice effect to the bouquet
First you need to determine how long you want the wire strands to be. Keep in mind this is what you'll be holding on to, so what I did was snip a few 10" strips to gauge how much would peek out from my fist. Do NOT snip the entire spool at this point, this is only to see if you need longer or shorter strips. If the 10" is fine, you will be snipping 20" strips, if not measure longer or shorter and double it.
You'll be stringing each pearl half way and folding the two ends over, then twisting the wire right under the pearl, as shown
Simple right?!
Now keep stringin' 'em pearls until you get the desired bouquet size, you can tape the stems when you've made some progress, to see how the bouquet is forming, like so
Here you can see the varying sizes & colors I previously mentioned. Snazzy
Finish it off by wrapping the taped stems with ribbon, tulle or whatever you please, and you have a glamorous, affordable bouquet! Just don't use this for the toss or you may knock someone out! Lol


.jpeg)
.jpeg)
.jpeg)